Turbo Dodge Forums banner

Likely Blown Head Gasket

7.6K views 76 replies 5 participants last post by  GrandpaSleeper  
#1 · (Edited)
Just came from this thread where areskcar suggested checking the coolant level. So I did. I found that it was empty in the overflow and only half full in the radiator. I know it was full in the rad and overfull in the overflow as I did the water pump last summer. I don’t see any leaks and my oil fill cap looks like this
Image

Which it did not last time I did an oil change. It is not rust. If feels spongy or chalky. But here’s where it gets interesting, after looking at the cap I expected to see a milkshake when I pulled my dip stick but it looked like this.
Image

(I know it is dark, it is almost time to change it) The oil is normal in color and at the same level as it was when I last checked.

I pulled my plugs to see if any looks weird and to stick my camera on a stick into the cylinders to see if one was cleaner than the others. Of course the camera’s battery was dead so I don’t have those pictures but here are the plugs (top or left is #1)
Image

Image


I think it must be a slow leak but maybe I’m wrong. What do you think?

It is the original gasket and I know they are known to degrade over time.

If I do do it which gasket is the good one and do I need new head bolts?
 
#2 · (Edited)
Just came from this thread where areskcar suggested checking the coolant level. So I did. I found that it was empty in the overflow and only half full in the radiator. I know it was full in the rad and overfull in the overflow as I did the water pump last summer. I don’t see any leaks and my oil fill cap looks like this View attachment 279337
Which it did not last time I did an oil change. It is not rust. If feels spongy or chalky. But here’s where it gets interesting, after looking at the cap I expected to see a milkshake when I pulled my dip stick but it looked like this. View attachment 279338
(I know it is dark, it is almost time to change it) The oil is normal in color and at the same level as it was when I last checked.

I pulled my plugs to see if any looks weird and to stick my camera on a stick into the cylinders to see if one was cleaner than the others. Of course the camera’s battery was dead so I don’t have those pictures but here are the plugs (top or left is #1) View attachment 279340
View attachment 279339

I think it must be a slow leak but maybe I’m wrong. What do you think?

It is the original gasket and I know they are known to degrade over time.

If I do do it which gasket is the good one and do I need new head bolts?
Be certain by getting the block test kit from autozone. NAJ knows the procedure I remember u put the thing over the rad with some dye and squeeze a bulb it sniffs out combustion gasses and the dye changes color.

Also note. When I got my 05 Altima (sat for years) I had a mystery coolant loss and weak heat but never saw any leaks. Then one day was really pushing it and the heat went out. Went to change the oil and found the lower rad hose spring clamp was cracked and it only leaked under load. Also new cars have stupid plastic covers so I never would have saw the leak unless by chance. I was ready to junk the thing since a Qr25De is not a Chrysler 2.5 level of complexity for a headgasket. After swapping the clamp no more coolant loss.
Image
 
#3 ·
Seems like a good candidate for a cyl. head re-torque.

I've solved a couple of minor coolant losses this way.

Thanks
Randy

Just came from this thread where areskcar suggested checking the coolant level. So I did. I found that it was empty in the overflow and only half full in the radiator. I know it was full in the rad and overfull in the overflow as I did the water pump last summer. I don’t see any leaks and my oil fill cap looks like this View attachment 279337
Which it did not last time I did an oil change. It is not rust. If feels spongy or chalky. But here’s where it gets interesting, after looking at the cap I expected to see a milkshake when I pulled my dip stick but it looked like this. View attachment 279338
(I know it is dark, it is almost time to change it) The oil is normal in color and at the same level as it was when I last checked.

I pulled my plugs to see if any looks weird and to stick my camera on a stick into the cylinders to see if one was cleaner than the others. Of course the camera’s battery was dead so I don’t have those pictures but here are the plugs (top or left is #1) View attachment 279340
View attachment 279339

I think it must be a slow leak but maybe I’m wrong. What do you think?

It is the original gasket and I know they are known to degrade over time.

If I do do it which gasket is the good one and do I need new head bolts?
 
#4 ·
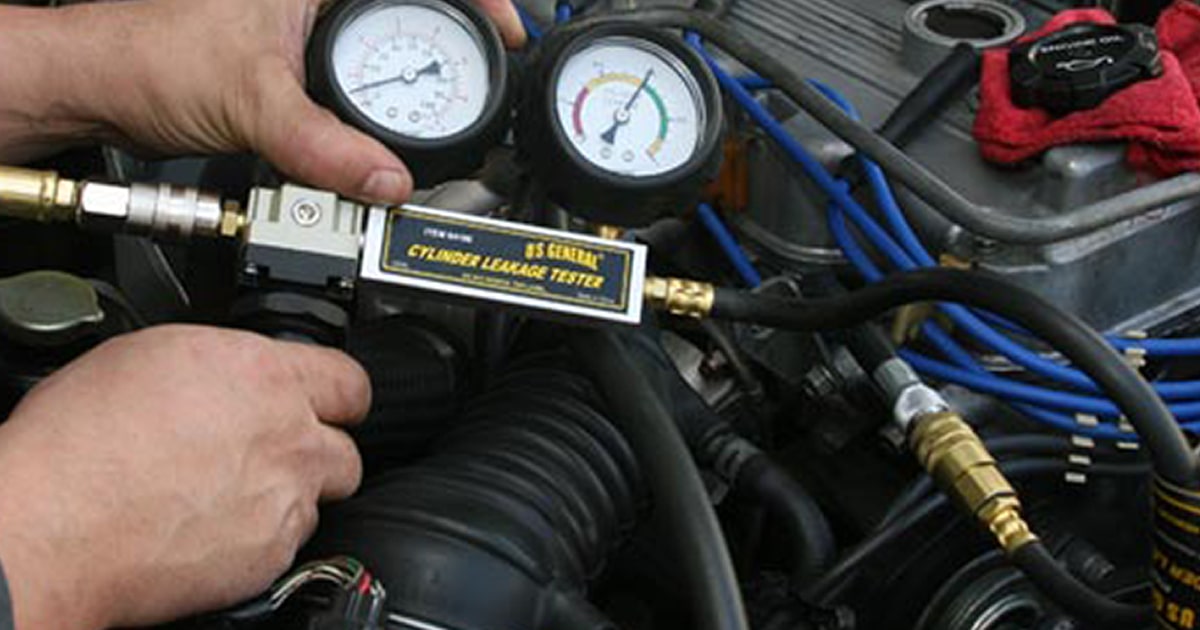
I will be getting a loaner head gasket leak tester tomorrow to confirm my suspensions.

Is there any advantage to not pulling the head and putting in a new gasket? To my knowledge it is the original gasket.

Other than the car will be down for a few days.

Any idea on the state of the oil cap. My only thought is that it has failed between a coolant and an oil passage but the leak is so small the coolant is boiling off and being drawn out the PCV leaving some deposits on the cap. And because it is boiling it didn’t make a milkshake
 
#5 ·
#2 spark plug is much cleaner than the others which indicates that may be the problem cylinder.

The "Block Tester" will only tell you if there are exhaust gases in the cooling system.
Compression will not be affected by a headgasket water jacket sealing issue.

The only true way to tell if the headgasket has a cooling system/cylinder leakage is by performing a "Cylinder Leak Down" test.
A Leakdown test will show you if there are any leaking headgasket issues and which cylinder(s) are affected.
Do you have access to an air compressor with a minimum of 100 PSI?

When you rent the block tester (you have to purchase the fluid) you may also want to rent a cooling system pressure tester.
Use the pressure tester to test for external leaks, leakdown of pressure, testing the rad cap and...
Connect the tester to the radiator, do not apply pressure, start the engine, pressure should build gradually, if pressure builds quickly there are exhaust gases in the cooling system.

 
#9 ·
It's non Turbo and if it didn't overheat the head shouldn't be cracked. I would still clean it and the block deck surface.

As far as headgaskets I like the Apex AHG1100 but the newer design Fel Pro is decent too but it is harder so make sure everything is clean. Whatever you do avoid the OLD design gaskets with unconnected fire rings and no corner reinforcement. Here a pic..

Top is New Fel Pro
Next is real old junk one
Next is old Fel Pro
Bottom is Apex
Image

I never had luck with the mopar gaskets and they don't make em anymore.
Image

You can see the blowout but on a TBI car might be OK up to you.

I tried the Apex gasket on a 2.5 Turbo I put together last year with 60$ pistons and the car is a daily driver gets pushed hard still holding and I just cleaned everything by hand no machine shop.
Image

Image
 
#10 ·
The gauge has never gotten above half way so I think it’s ok. (Not that the gauge is very accurate)

I am expecting to see the cracks between the valve sets that I have heard other people on the forum say are almost always there.

This is a list of what I plan to get.
  • Thermostat gasket
  • Head gasket
  • Valve cover gasket
  • Intake/exhaust gasket + EGR gasket (why not do it with it out of the car)
  • Spark plugs
  • Valve stem seals (I don’t want to remove the valve cover for the 4th time)
  • Oil pan gasket (leaking from where I botched my etc job on the front main seal plate)
  • Oil + filter and coolant change
Do you think I am missing anything?
 
#11 ·
The gauge has never gotten above half way so I think it’s ok. (Not that the gauge is very accurate)

I am expecting to see the cracks between the valve sets that I have heard other people on the forum say are almost always there.

This is a list of what I plan to get.
  • Thermostat gasket
  • Head gasket
  • Valve cover gasket
  • Intake/exhaust gasket + EGR gasket (why not do it with it out of the car)
  • Spark plugs
  • Valve stem seals (I don’t want to remove the valve cover for the 4th time)
  • Oil pan gasket (leaking from where I botched my etc job on the front main seal plate)
  • Oil + filter and coolant change
Do you think I am missing anything?
Head bolts brake parts cleaner razor blades to clean the deck and maybe white roloc disks for the head and a straight edge and Feeler gauge to check warpage
 
#12 ·
To remove the head all that needs to come off is the timing belt, valve cover, wires in throttle body area, head bolts, bolts to rest of exhaust, coolant, and oil correct?

Was hopping to get it disassembled tomorrow because it will be 53Âş. Then get it back together this weekend when the new parts arrive.
 
#15 ·
I hope you're Built like Stone Cold Steve Austin because leaning over the radiator and lifting up I barely got the head off with just the exhaust manifold on.

And hopefully yours doesn't look like this I can't believe I was driving this thing yesterday on the highway..
Image

Modern cars with blown headgaskets can only run 5-7 minutes but these things keep going...
 
#18 ·
Got the head off yesterday and this is what I found.

Image


Cylinder #4
Image


Cylinders #3 and #2
Image


Cylinder #1
Image


I think that someone in the past put stop leak in causing a lot of the passages to get pluged. I’m more suprised it hadn’t overheated yet.
Image


Cylinder #4
Image


Cylinder #3
Image


Cylinder #2
Image


Cylinder #1
Image


Head on the table
Image


What is the flat spot with the hole in it on the right side of the intake manifold used for?
 
#21 ·
2 other pictures

Engine bay without head.
View attachment 279589

All the stuff that had to come off. Also took off the weird splash shield near the long cv axel (on table out of shot)
View attachment 279588
How does the head look? I started cleaning mine up and found huge cracks from the water jackets to the chambers.
Image
Image

Machine shop wanted too much so I used a $5 Flat piece of counter thing (it's flat) and glued some sandpaper to it.
Image

If you have a straight edge check that your head isn't warped if it's not you can just clean everything up and put it back together. My head is junk so gonna take a ride and get this 86 2.5 Tall block. Guy said he pulled it 20 years ago it ran great (car rotted) so the head should still be good. For $60 why not.
Image
 
#20 ·
All I can say is, WOW!
Glad you found the issue.
How are you going to clean the water jacket in the block?

I looked in the Chrysler Parts Catalog for your manifold question, they show the manifold with the area you are referring to, however, they do not show anything being attached there, each catalog from 86-92 shows the same area on the manifold.
It appears to be a machined surface and looks clean as if something where there.
 
#22 ·
The only buildup appears to be by the head gasket. I was just going to scrape it and flush out the chunks through the lower rad house. I have had the water pump, thermostat, heater core, heater diverted valve and rad cap off and have seen little to no build up.

I do have some stalactites in the rad but I am hesitant to try to clean it with something like CLR because there might be some stop leak plugging holes in the core.

My only thought with the spot on the intake is that the air box is intended to sit there to relieve stress from the TBI.

It would work as a turbo support bracket mounting point but they didn’t use this intake with a turbo.
 
#24 · (Edited)
The only buildup appears to be by the head gasket. I was just going to scrape it and flush out the chunks through the lower rad house. I have had the water pump, thermostat, heater core, heater diverted valve and rad cap off and have seen little to no build up.

I do have some stalactites in the rad but I am hesitant to try to clean it with something like CLR because there might be some stop leak plugging holes in the core.

My only thought with the spot on the intake is that the air box is intended to sit there to relieve stress from the TBI.

It would work as a turbo support bracket mounting point but they didn’t use this intake with a turbo.
I just checked it's a bracket that bolts on to that to support the airbox.
Image

Rear view from that engine I gotta pick up
Image


Image
 
#32 ·
Got the head apart and only broke one bolt. And it’s not an important one.
Image

Does the tube actually do anything useful? The end fell apart and it is very fradgel. The clamp used to hold on to the metal part on the manifold is probably the worst one I’ve ever seen while still working. The one bolt that I broke is one of the 3 that hold on the metal part to the manifold.

Would it be better to wrap the exhaust manifold in exhaust tape to try to keep the heat down. The original split loom crumbled in my hand so I put some new stuff on. When I went pulled the head I had to cut the melted remnants of the split loom off the harness.

That area just becomes an oven with the heat from the exhaust and valve cover and the air filter box stoping the heat from escaping quickly.

What do you suggest doing?

Ultrasonic cleaners are great
before
Image


Image


(it was all black before)
Image
 
#33 ·
The flexible tube allows the Engine to inhale heated air during warm up.

The metal shield it attaches to gets heated by the exhaust manifold.

Once warm, the Engine inhales cooler air from the end of the airbox.

Inside the air box is a flap that directs where are air is coming from.

Also, there is a vacuum thermostat that controls the flap opening.

This system helps with driveability during inclement weather.

Thanks
Randy
 
#34 ·
Almost done cleaning everything. Just have valve train left to go. Then I will do a quick valve lap and into reassembly. It’s going back on how it came off with intake and exhaust manifolds installed.

A quick paint job makes everything look better. I also did the throttle body, heat collector, some bolts, brackets, fuel lines, EGR tube, EGR valve, and coolant hard line to the manifold. (It is VHT exhaust manifold paint good up to 1000 degrees or something)
Image


The head cleaned up nice.
Image

Image

Image


Why does my head have extra small coolant passages near the cylinders on the right side of the head? I have seen other pictures of heads that don’t have them. Is it a late 88 change (it is a November 88 head on a March of 89 car)
Image

I have the usual cracks between valve seats on 2 and 4. 3 has a partial crack and 1 has none.

Image


Exhaust on 3 has an interesting pattern.