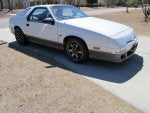
1990 Dodge Daytona rear wheel drive conversion
Hello all,
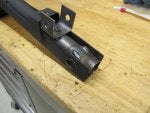
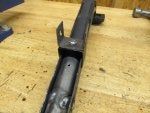
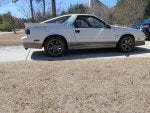
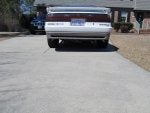
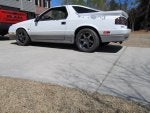
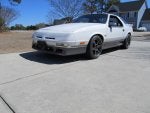
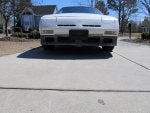
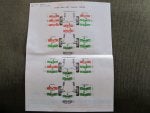
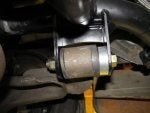
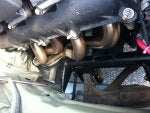
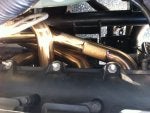
Thought I'd upload some pictures of version 2 rear wheel drive conversion on my 1990 Dodge Daytona RWD conversion. This design completely bolts in!! Yes we still need to remove the spare tire well and relocate the gas tank, but it's the least cutting design I have to date. It also uses frame connectors that go inside the front frame rails all the way up to the turn up at the firewall. After bolting in it's welded in to ensure strength. Mocking up the fuel system now and plan to drive it around for a bit with the front wheel drive to see how it rides then I'll start version 3 of the front.
Already planned changes:
- custom gas tank that uses Daytona fuel pump and gas gage
UPDATE: 4 June
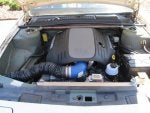
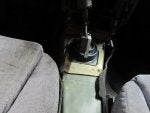
I got the car running today and took it for it's first drive! It's still front wheel drive, but now the back is 100% done. I'll start the front once I get to KS.
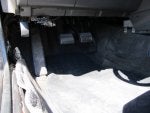
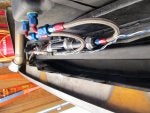
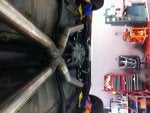
The rear suspension is awesome!! It rides like a stock Daytona! The ride height is perfect. It sits about 1" lower than a stock Daytona and I have plenty of adjustment to go up or down.
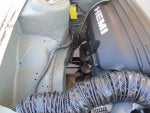
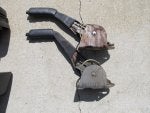
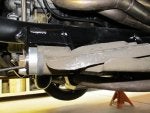
I finally got the front set up today too. So I'm running a Grand Caravan wheel bearing, with Ford .590 knurl 1/2-20 3" studs, .380 thick hats with .260 offset and 13" rotors with a .712 caliper spacer. I put the longer wheel studs in for added security and to make the whole car 1/2 -20 thread. The best part is now everything is 5 x 4.5" and I can run a single bolt pattern wheel with no wheel spacers.
More to follow
Enjoy
Tom
Hello all,
Thought I'd upload some pictures of version 2 rear wheel drive conversion on my 1990 Dodge Daytona RWD conversion. This design completely bolts in!! Yes we still need to remove the spare tire well and relocate the gas tank, but it's the least cutting design I have to date. It also uses frame connectors that go inside the front frame rails all the way up to the turn up at the firewall. After bolting in it's welded in to ensure strength. Mocking up the fuel system now and plan to drive it around for a bit with the front wheel drive to see how it rides then I'll start version 3 of the front.
Already planned changes:
- custom gas tank that uses Daytona fuel pump and gas gage
UPDATE: 4 June
I got the car running today and took it for it's first drive! It's still front wheel drive, but now the back is 100% done. I'll start the front once I get to KS.
The rear suspension is awesome!! It rides like a stock Daytona! The ride height is perfect. It sits about 1" lower than a stock Daytona and I have plenty of adjustment to go up or down.
I finally got the front set up today too. So I'm running a Grand Caravan wheel bearing, with Ford .590 knurl 1/2-20 3" studs, .380 thick hats with .260 offset and 13" rotors with a .712 caliper spacer. I put the longer wheel studs in for added security and to make the whole car 1/2 -20 thread. The best part is now everything is 5 x 4.5" and I can run a single bolt pattern wheel with no wheel spacers.
More to follow
Enjoy
Tom